Group assignment3: 3D Printing
3D printing uses computer-aided design (CAD) to create three-dimensional objects through a layering method. Sometimes referred to as additive manufacturing, 3D printing involves layering materials, like plastics, composites or bio-materials to create objects that range in shape, size, rigidity and color.
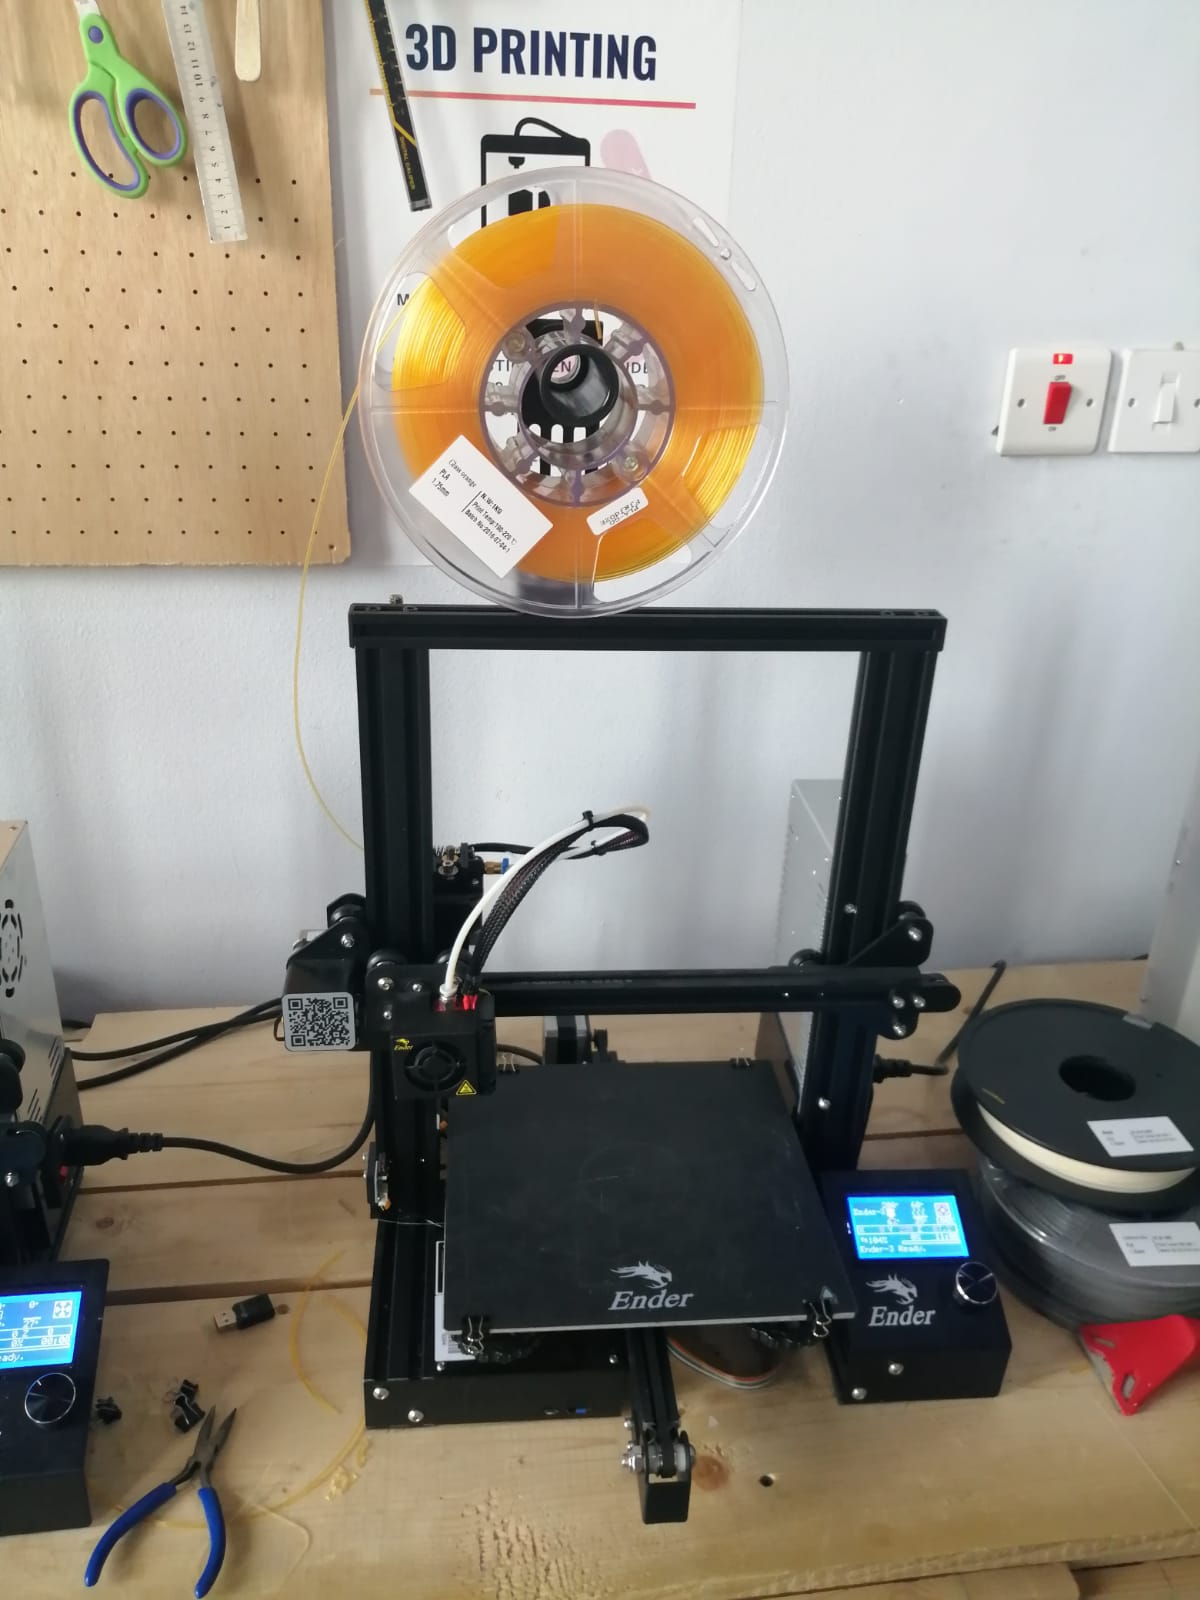
3D printers are part of the additive manufacturing family and use similar methods to a traditional inkjet printer- albeit in 3D. It takes a combination of top-of-the-line software, powder-like materials and precision tools to create a three-dimensional object from scratch. The following photo shown the 3d printing machine.
In order to understand the meaning of the filaments used we should know that, the material used on the same body have different filling characteristics while building the body itself by the machine. The program determine the better thickness and infill used to your desired printed object.
Layered height
Layer height is exactly what it sounds like: the exact height of each layer of plastic extruded, cured, or sintered by a 3D printer. This setting is adjusted through a slicer program and has many more effects on the final print than one might think at first. Used properly, this setting will increase your print’s speed, resolution, and smoothness.
Note that the 3D printing in the following picture describe what I have stated above.
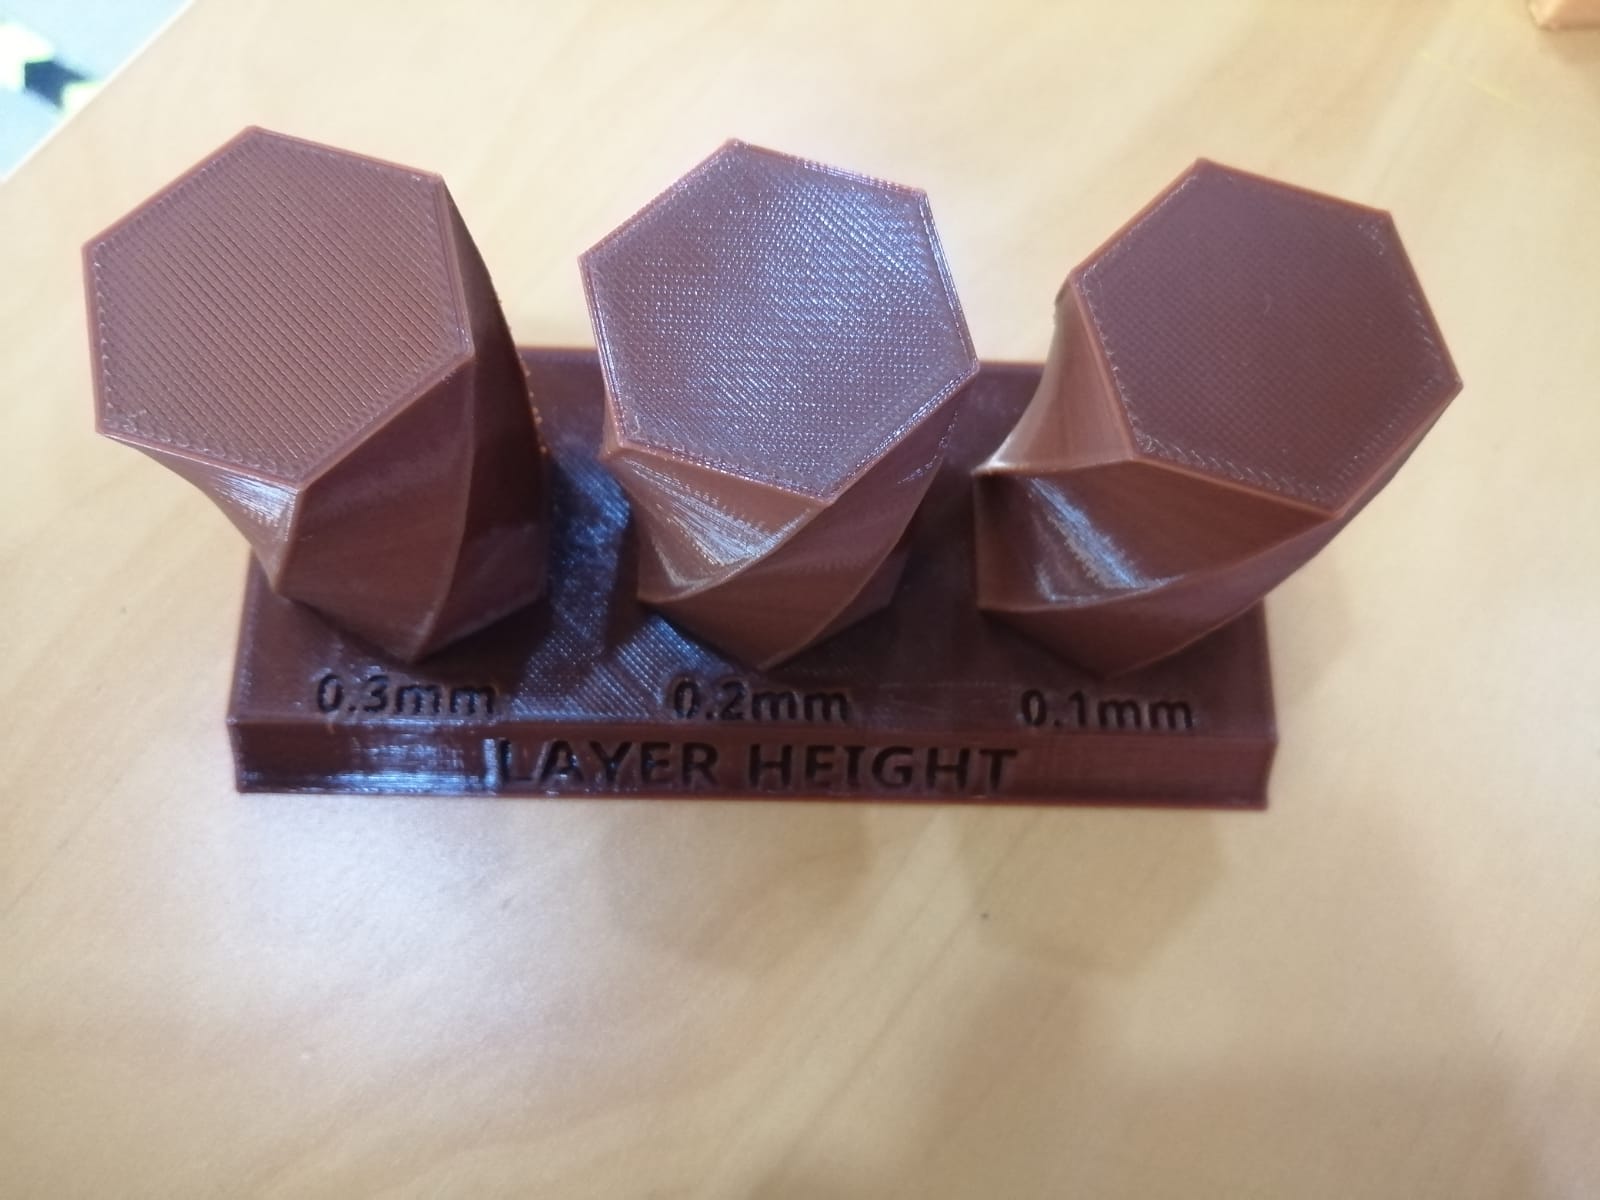 if you minimized the layered height you will have a better surface roughness finishing to the design, this will take for granted more time to do than the 0.3mm one since it requires more layer in order to build the model. By this, 0.3mm is faster while printing but the surface finish is not the ideal. You choose what is applicable and desired to your design.
Shell thickness
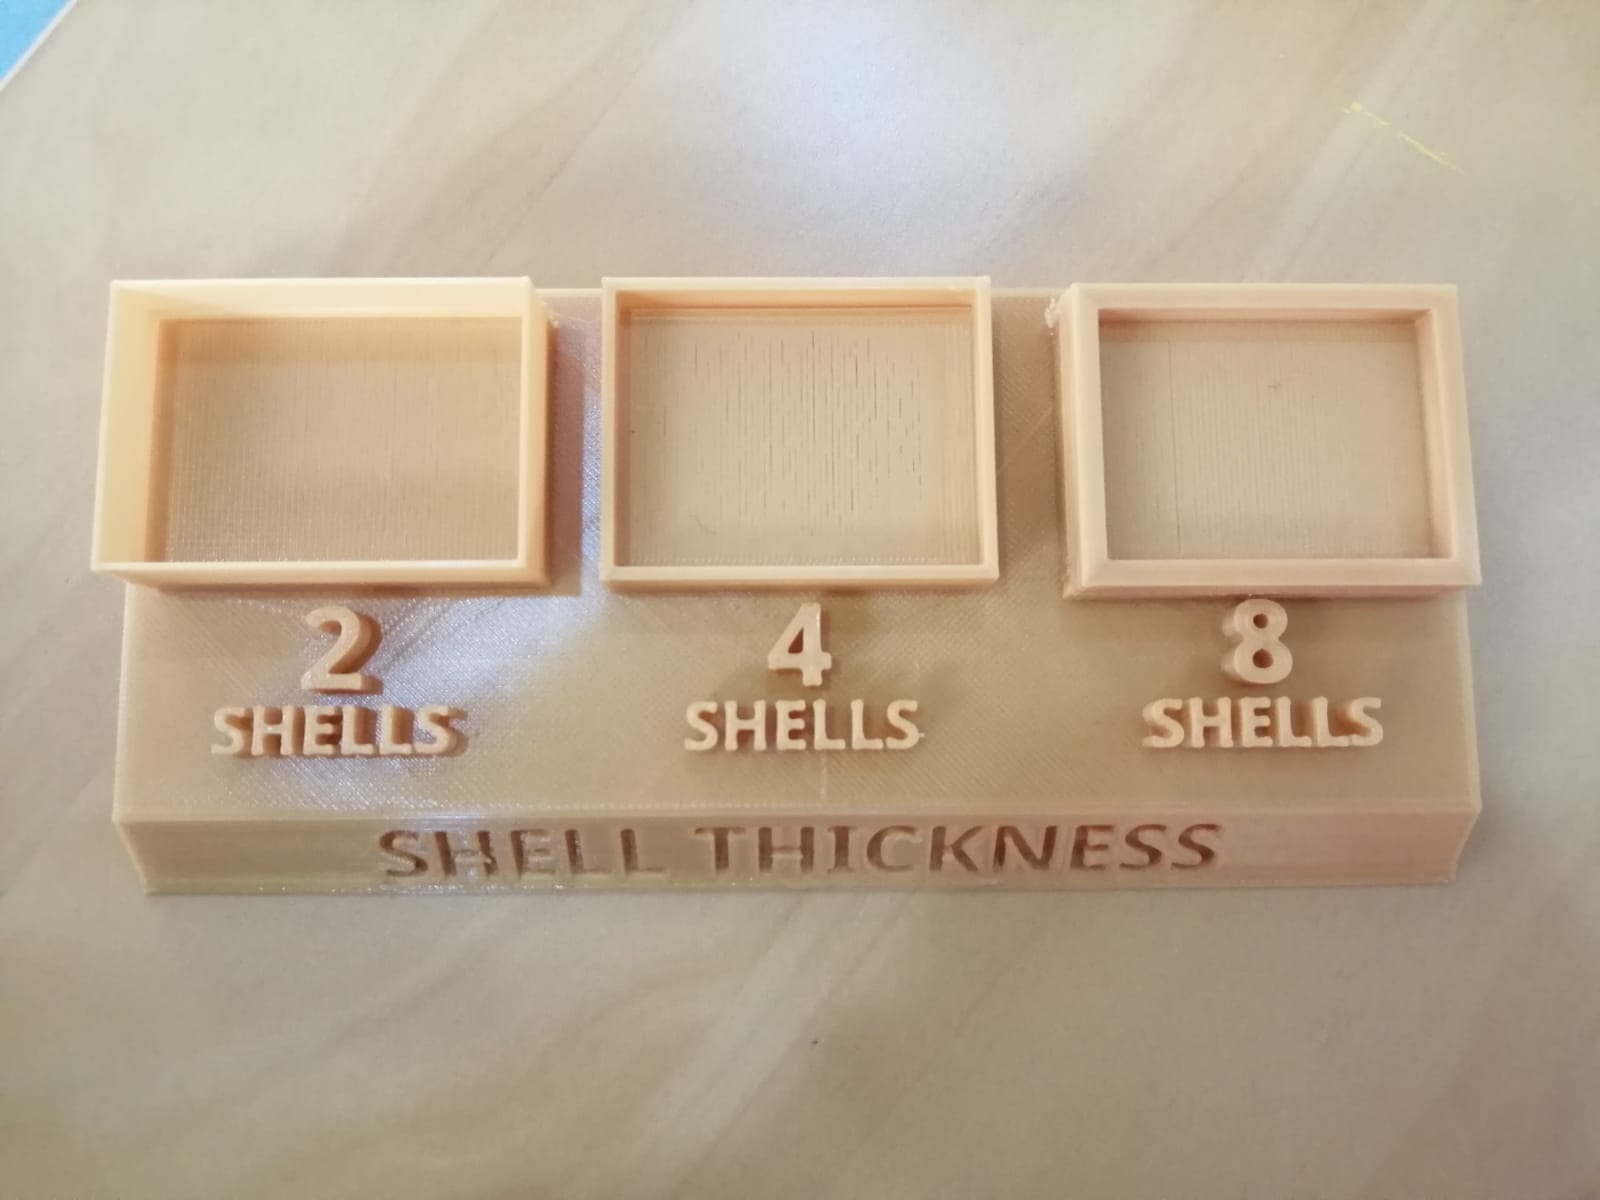 On the above photo you can see what is the shell thickness of each. Each number written is the number of shells that were performed by the 3D printer 2 has the thinner shell thickness and 8 is thicker because it has larger thickness than the others.
The walls of a 3D printed object, including its top and bottom surfaces, are collectively known as its shell. The shell thickness of any 3D printing project can be easily set using the appropriate slicer software. In most cases, the shell thickness will be set at a multiple of the nozzle diameter. The selection of shell thickness is a compromise between several different factors, such that there is no value that is universally correct.
On the above photo you can see what is the shell thickness of each. Each number written is the number of shells that were performed by the 3D printer 2 has the thinner shell thickness and 8 is thicker because it has larger thickness than the others.
The walls of a 3D printed object, including its top and bottom surfaces, are collectively known as its shell. The shell thickness of any 3D printing project can be easily set using the appropriate slicer software. In most cases, the shell thickness will be set at a multiple of the nozzle diameter. The selection of shell thickness is a compromise between several different factors, such that there is no value that is universally correct.
Hold
 In this photo you can see that if the 3d printer nozzle passed vertically and performed a vertical kind of bridges the longer is it were its most likely to bend over. It may not be noticed while first seeing the photo but clearly there is a slightly bend to the structure.
So make sure if you want to perform a design that include such a structure, by estimating the proper distance that can the PLA plastic holds the structure upon.
In this photo you can see that if the 3d printer nozzle passed vertically and performed a vertical kind of bridges the longer is it were its most likely to bend over. It may not be noticed while first seeing the photo but clearly there is a slightly bend to the structure.
So make sure if you want to perform a design that include such a structure, by estimating the proper distance that can the PLA plastic holds the structure upon.
Angles
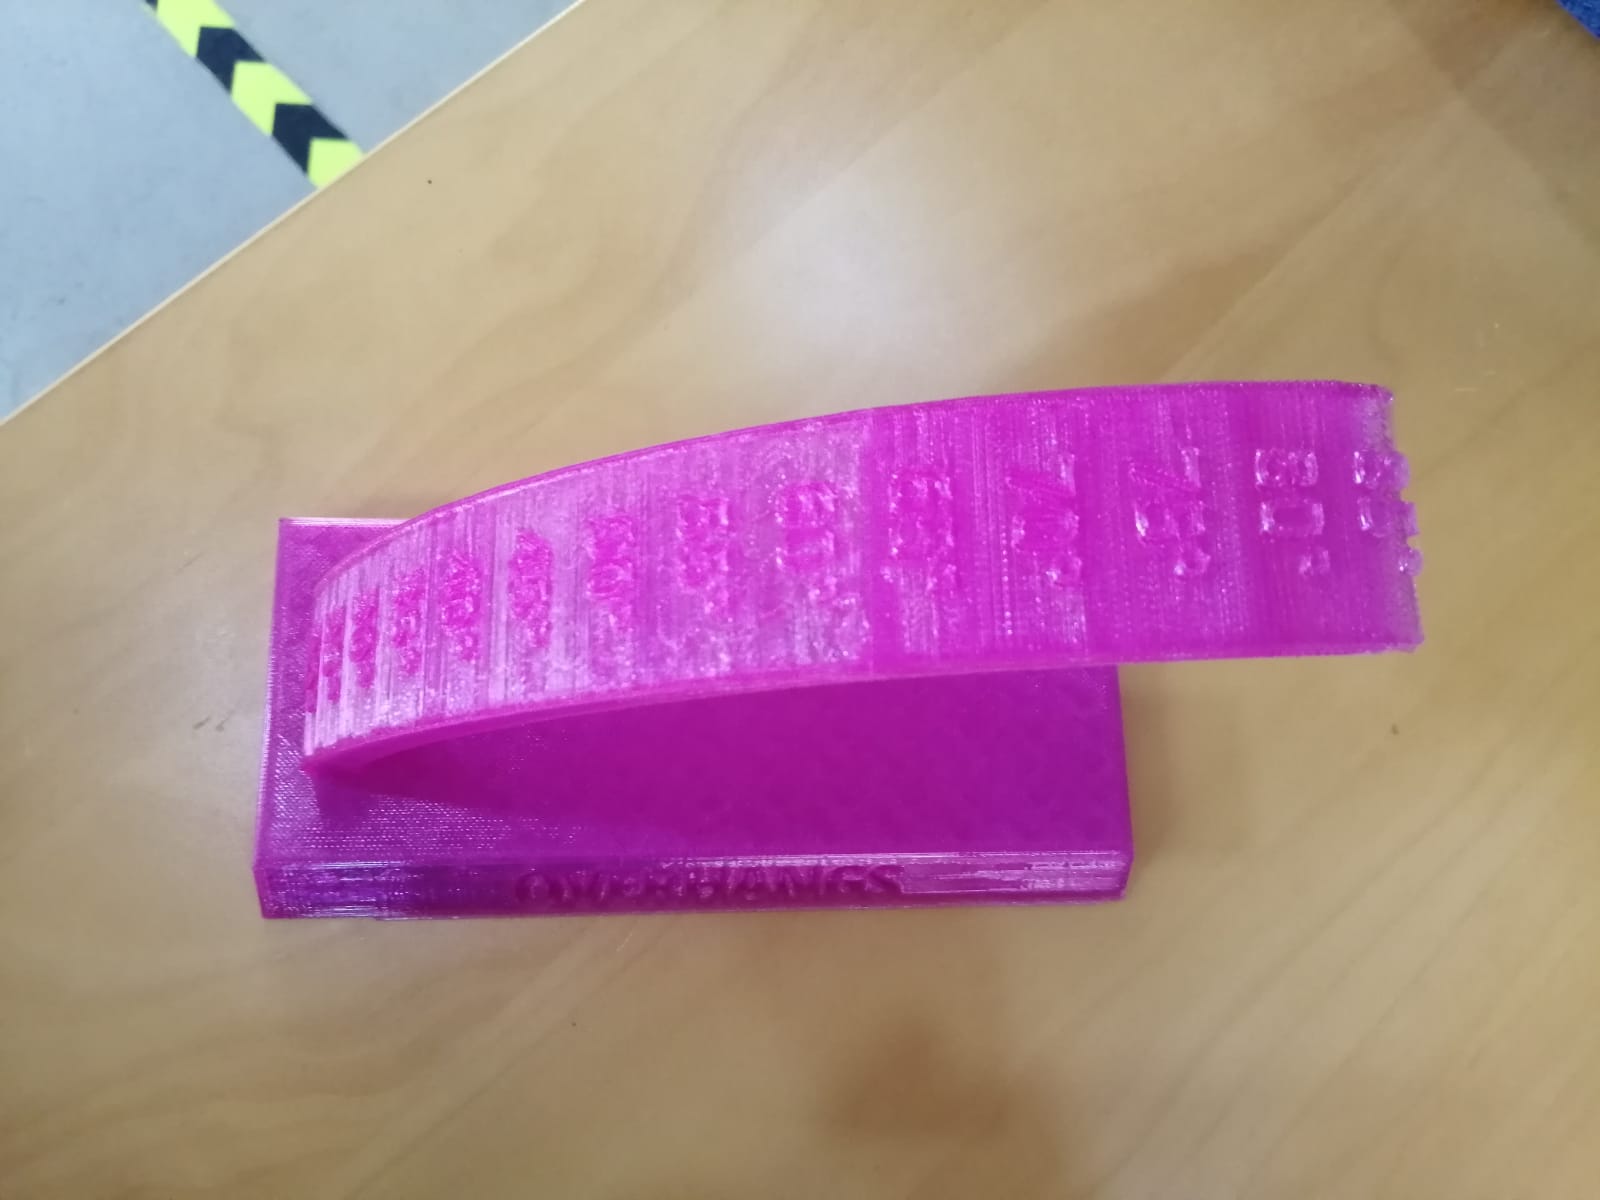 On the above photo you can see that the bend angle that can the structure hold is maximum 80 degrees, anything above will not be performed unless you apply a support section under the desired part. But it is not preferable if you have a thin base.
Steps
The program we are using is 'Ultimaker Cura' 4.50. So in order to preform the 3d printing you should follow the following steps:
Open the folder and upload all the designs files from the computer which is connected to the 3d printing machine.
![]()
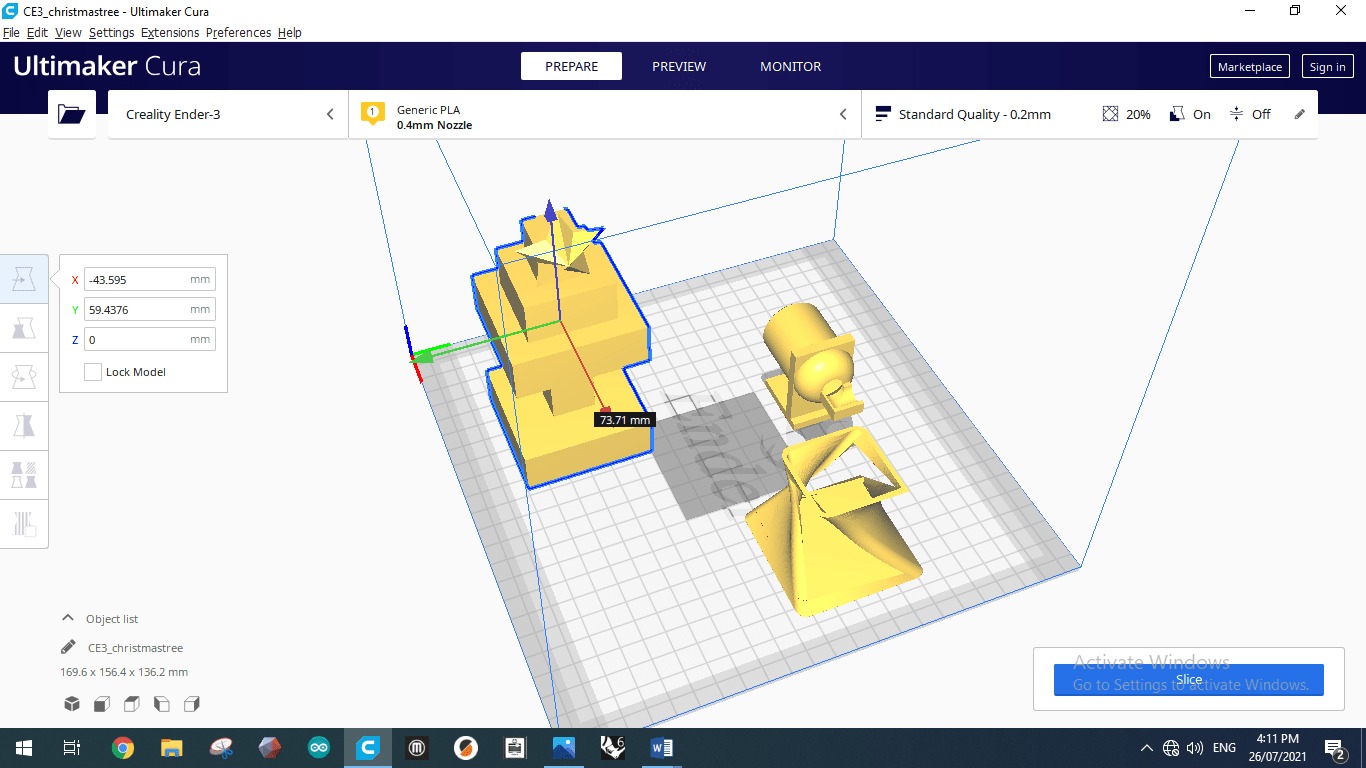
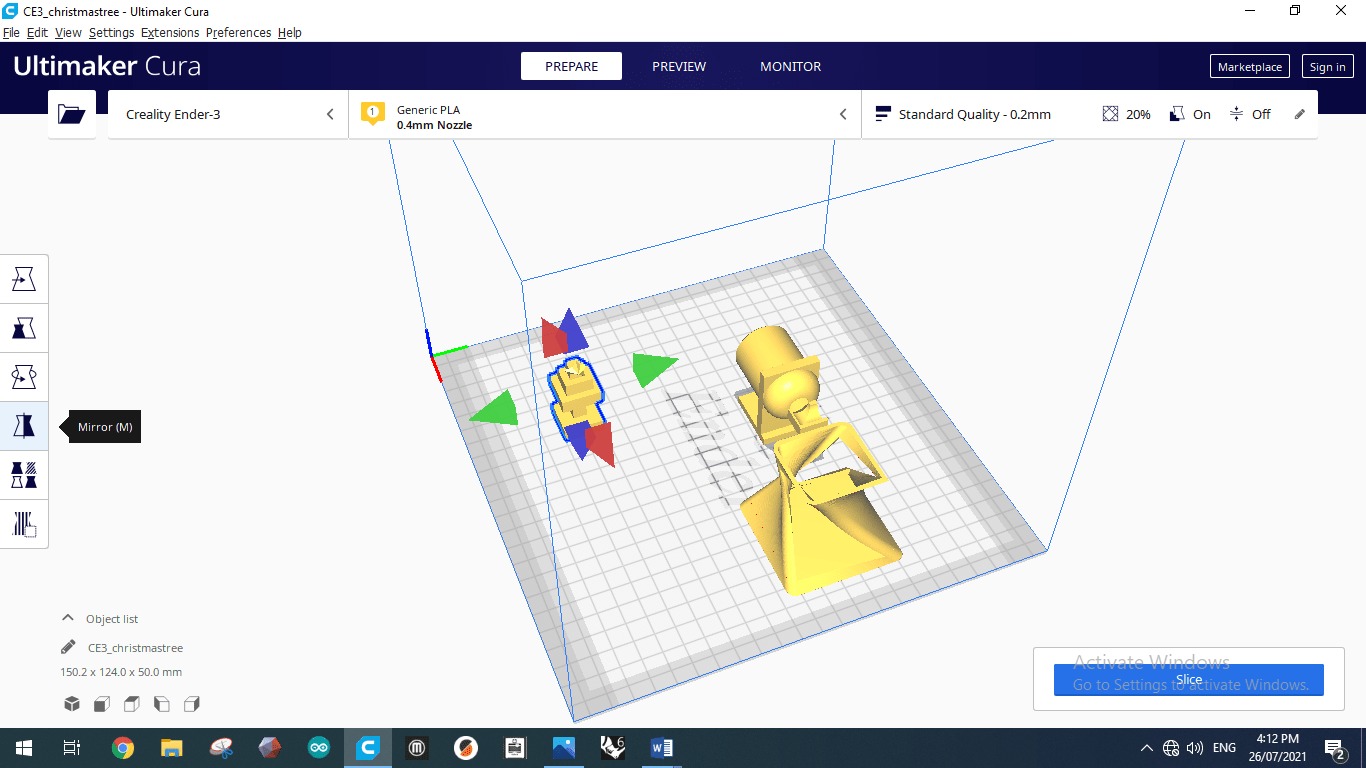
The following function stated on the below picture is the "move" action, where by it you can move the objects to the desired place in 3d dimensions (x-y-z planes).
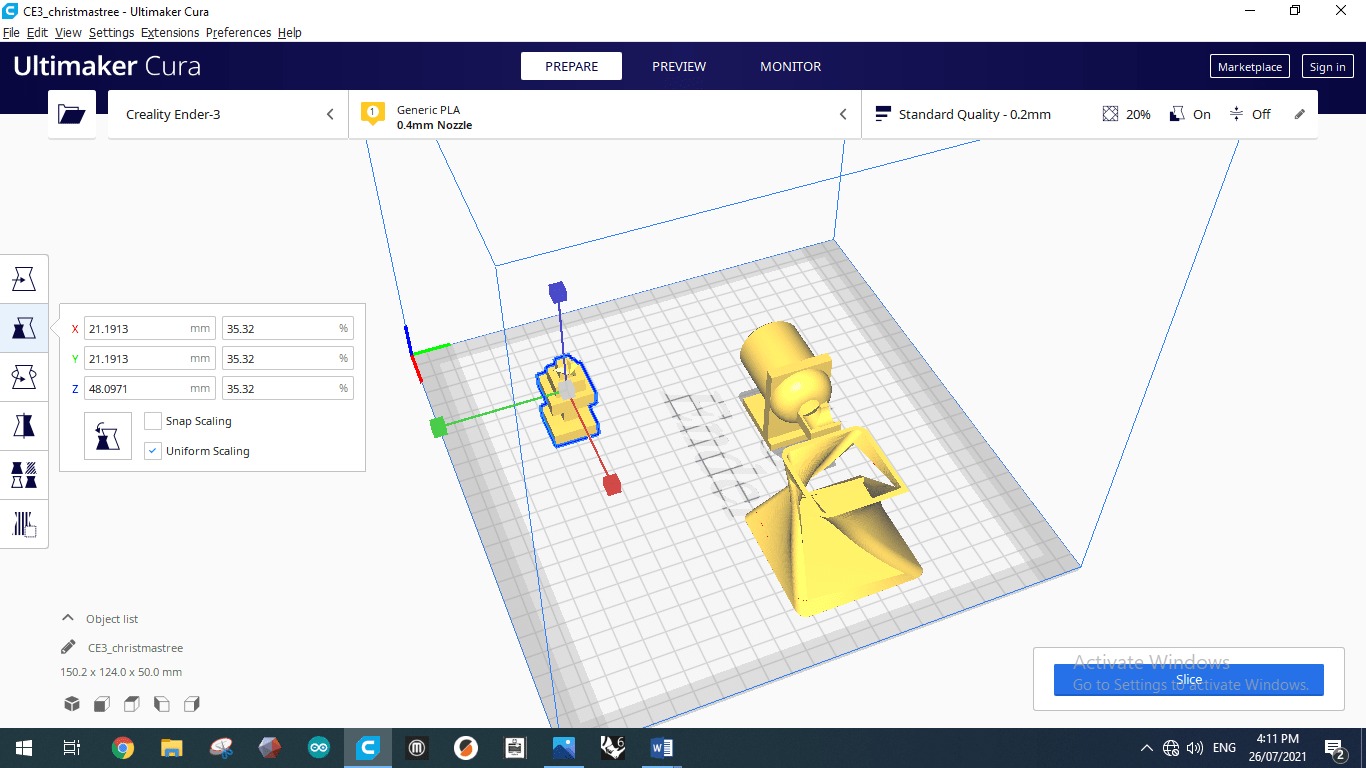
By the next step is an option that we can by it resize the object by enlarging or reducing the size of the 3d model.
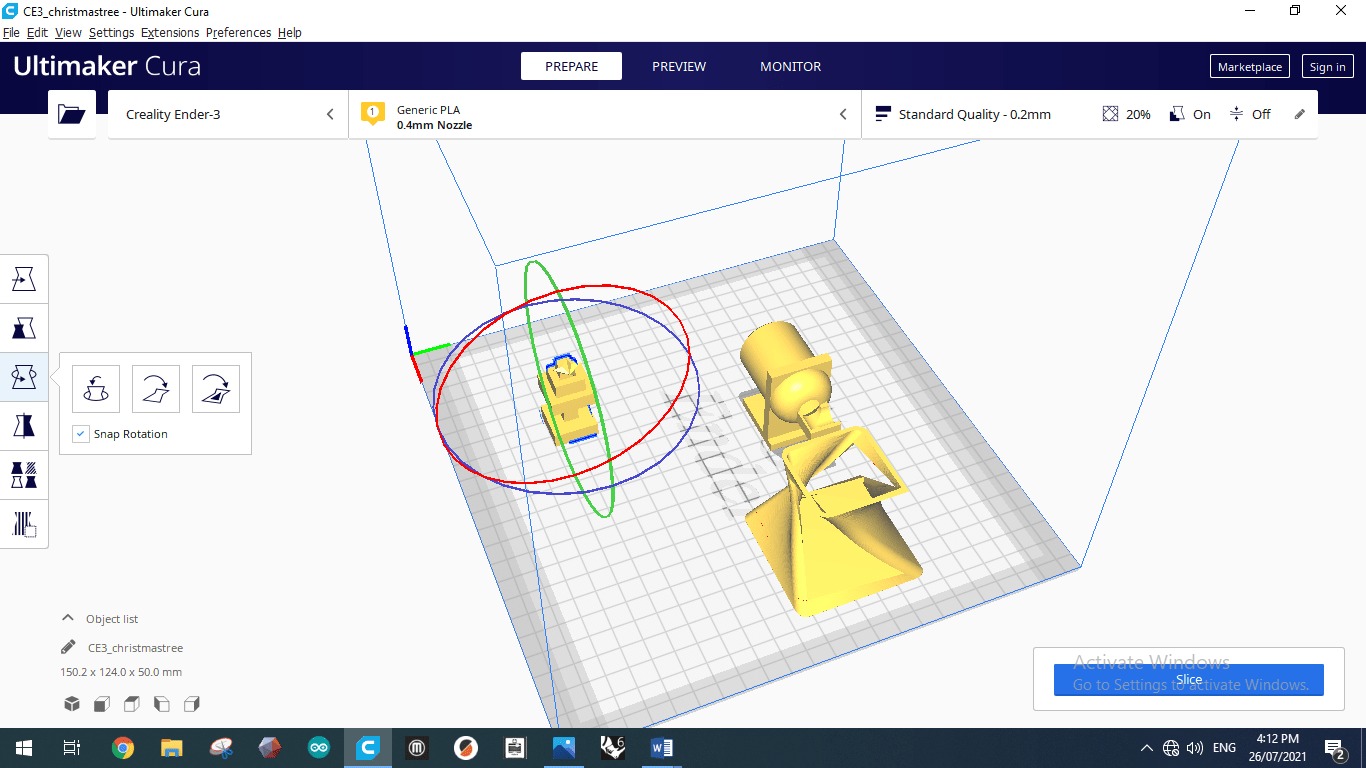
Next is the rotating option where you can tilt your object around in 360 degree angle.
Finally there is an option where you can mirror objects.
 The following photos shows the standard quality default setup.
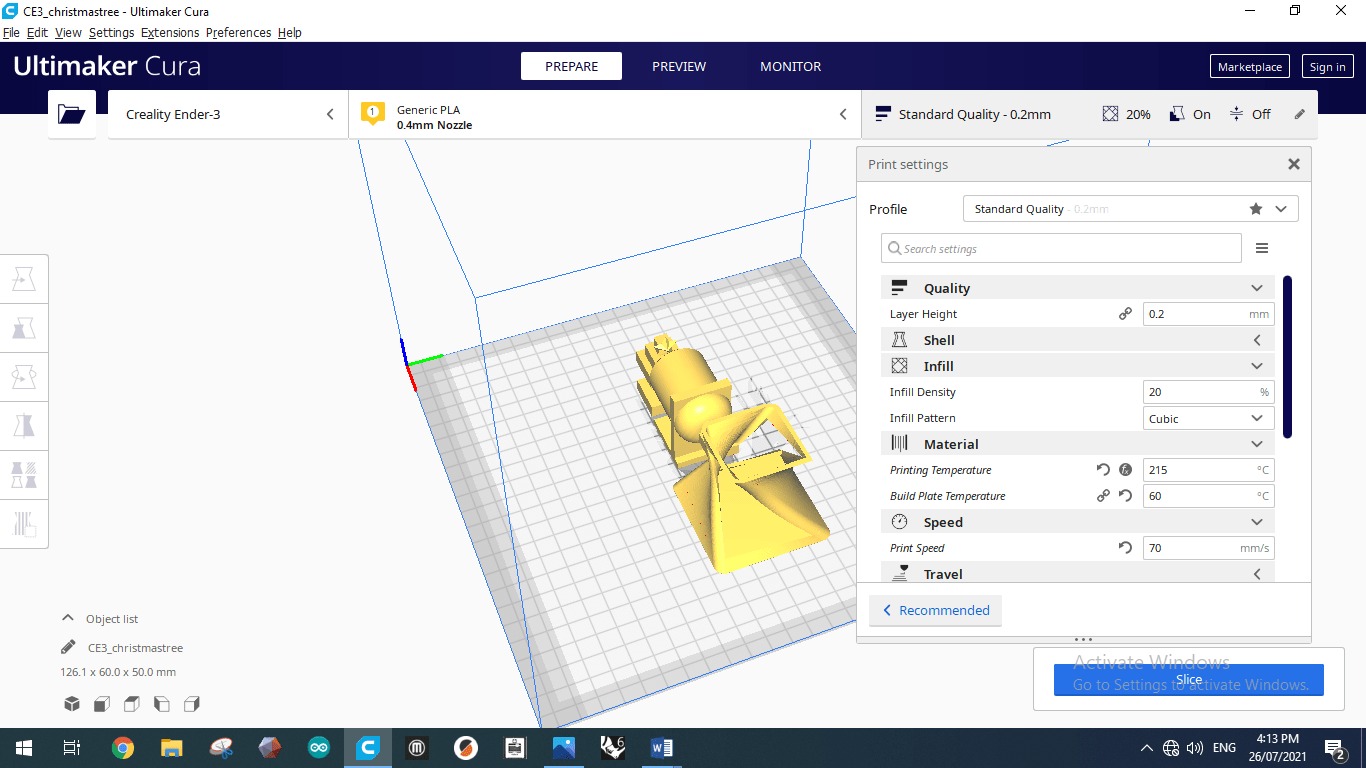
 Layer height is 0.2mm. Infill density is 20% where the infill takes cubic shape. The material used is PLA where the melting temperature of this plastic reaches 200 degrees. Just in case of any heat losses during the operation the entered temperature is 215 degrees. The build plate temperature is the temperature of the plate which is the bed where the 3d printer will be on. It should be kept at a high temperature to insure that the modeled design is stiffly stack to the board. The speed of printing has a desirable value of 70 mm/s.
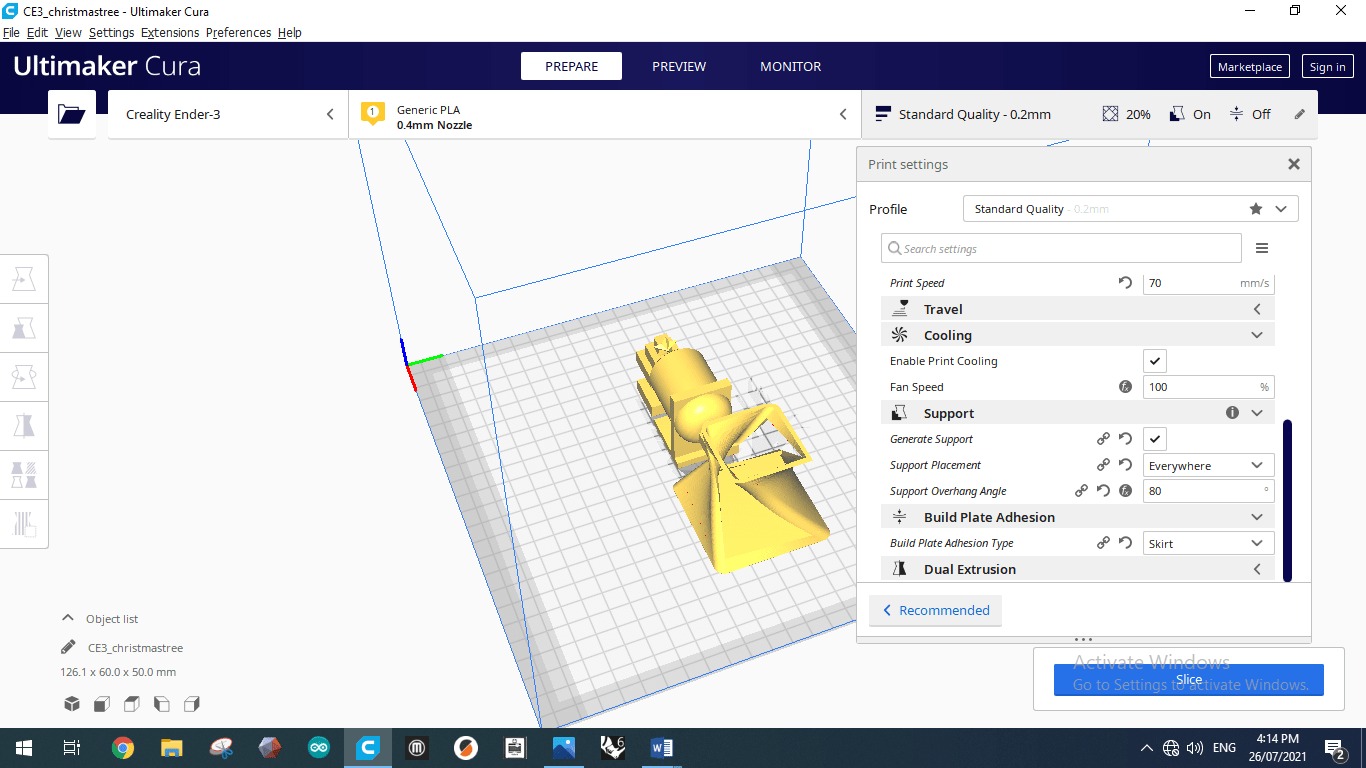
Cooling speed is the speed where the material should be cooled by fans applied to the design; is stated by 100%. Next, support option is generated to the design everywhere by an angle of 80 degrees as we stated above on the hold section. Finally, build plate adhesion type is skirt. skirt means that the machine nozzle works and draw a line around the shapes that we want to print in order to check if the PLA sticks to the board or no. And also to get rid of any excess material was stuck inside the machine by previous printing operations. These skirt is called as baby-steps to the machine where the nozzle get along while extruding the PLA from it.
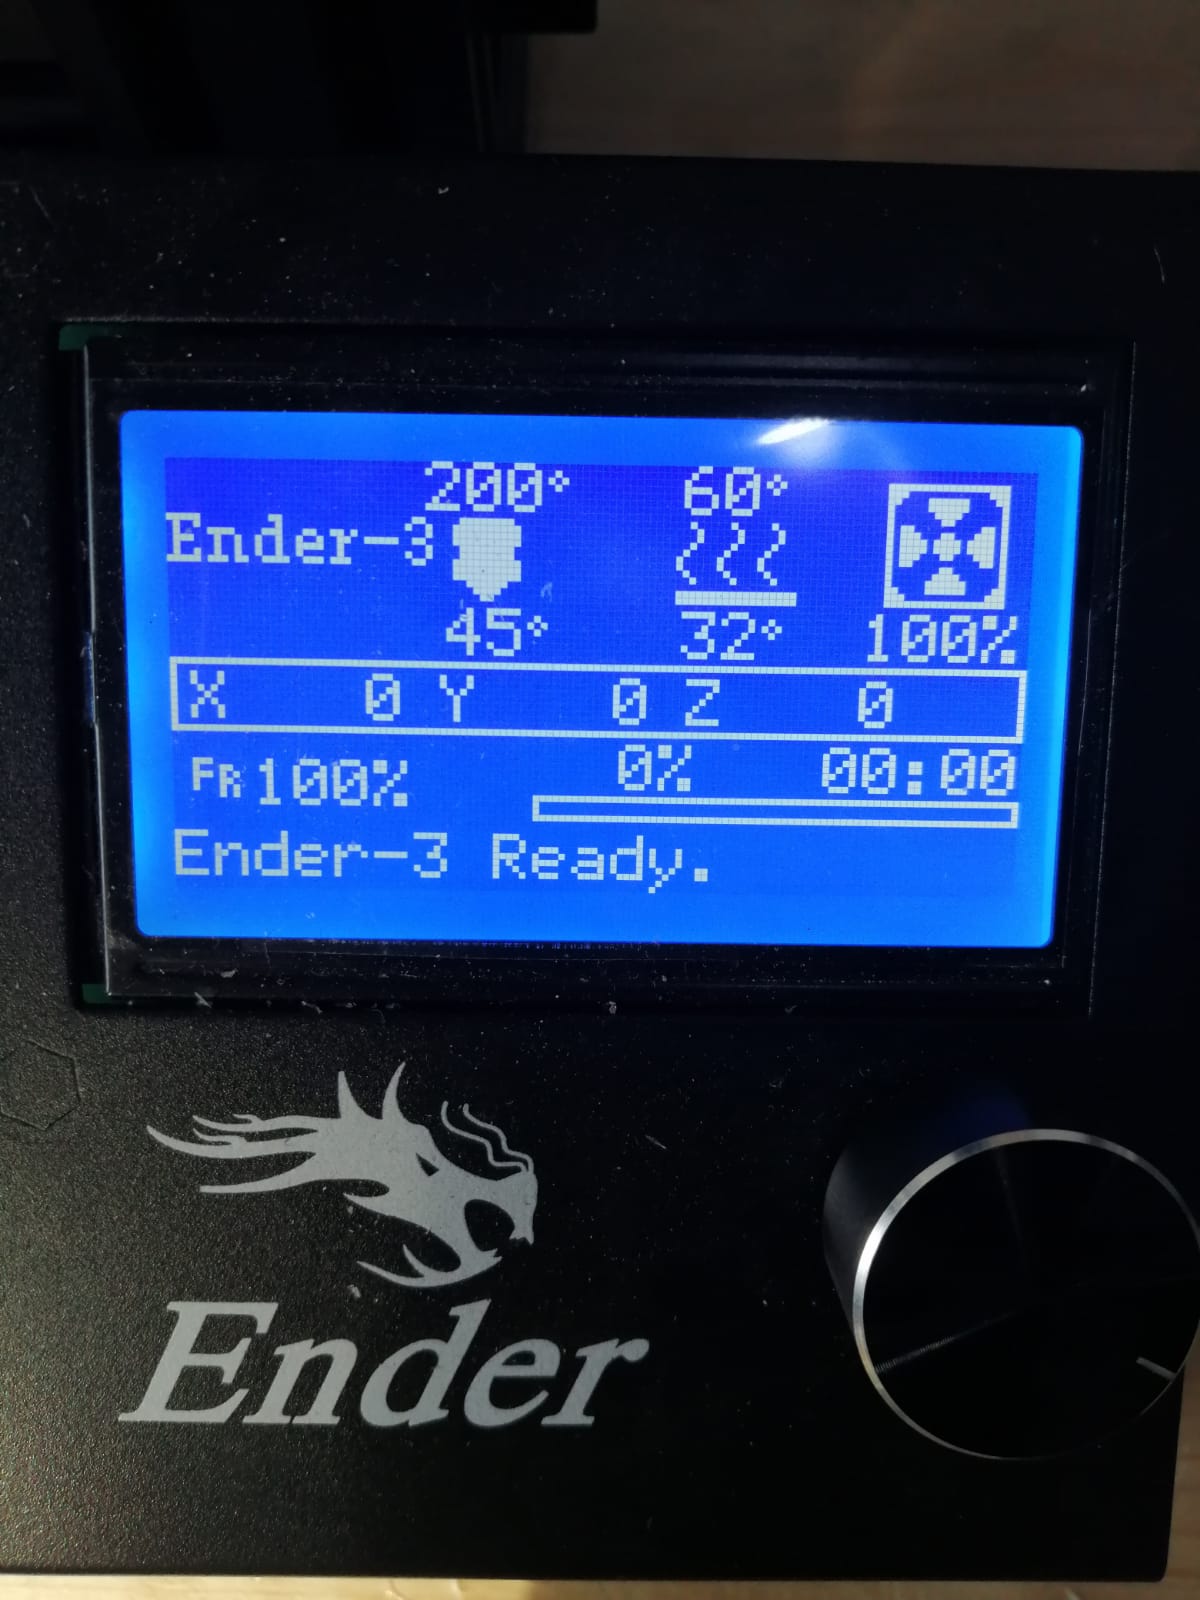
The following photo shows the 3d printer machine monitor screen where you can edit and adjust preheating the device to reach the desired temperature of 200 degrees. And also check the design planes where (x,y,z) plane is (0,0,0).
Layer height is 0.2mm. Infill density is 20% where the infill takes cubic shape. The material used is PLA where the melting temperature of this plastic reaches 200 degrees. Just in case of any heat losses during the operation the entered temperature is 215 degrees. The build plate temperature is the temperature of the plate which is the bed where the 3d printer will be on. It should be kept at a high temperature to insure that the modeled design is stiffly stack to the board. The speed of printing has a desirable value of 70 mm/s.
Cooling speed is the speed where the material should be cooled by fans applied to the design; is stated by 100%. Next, support option is generated to the design everywhere by an angle of 80 degrees as we stated above on the hold section. Finally, build plate adhesion type is skirt. skirt means that the machine nozzle works and draw a line around the shapes that we want to print in order to check if the PLA sticks to the board or no. And also to get rid of any excess material was stuck inside the machine by previous printing operations. These skirt is called as baby-steps to the machine where the nozzle get along while extruding the PLA from it.
The following photo shows the 3d printer machine monitor screen where you can edit and adjust preheating the device to reach the desired temperature of 200 degrees. And also check the design planes where (x,y,z) plane is (0,0,0).
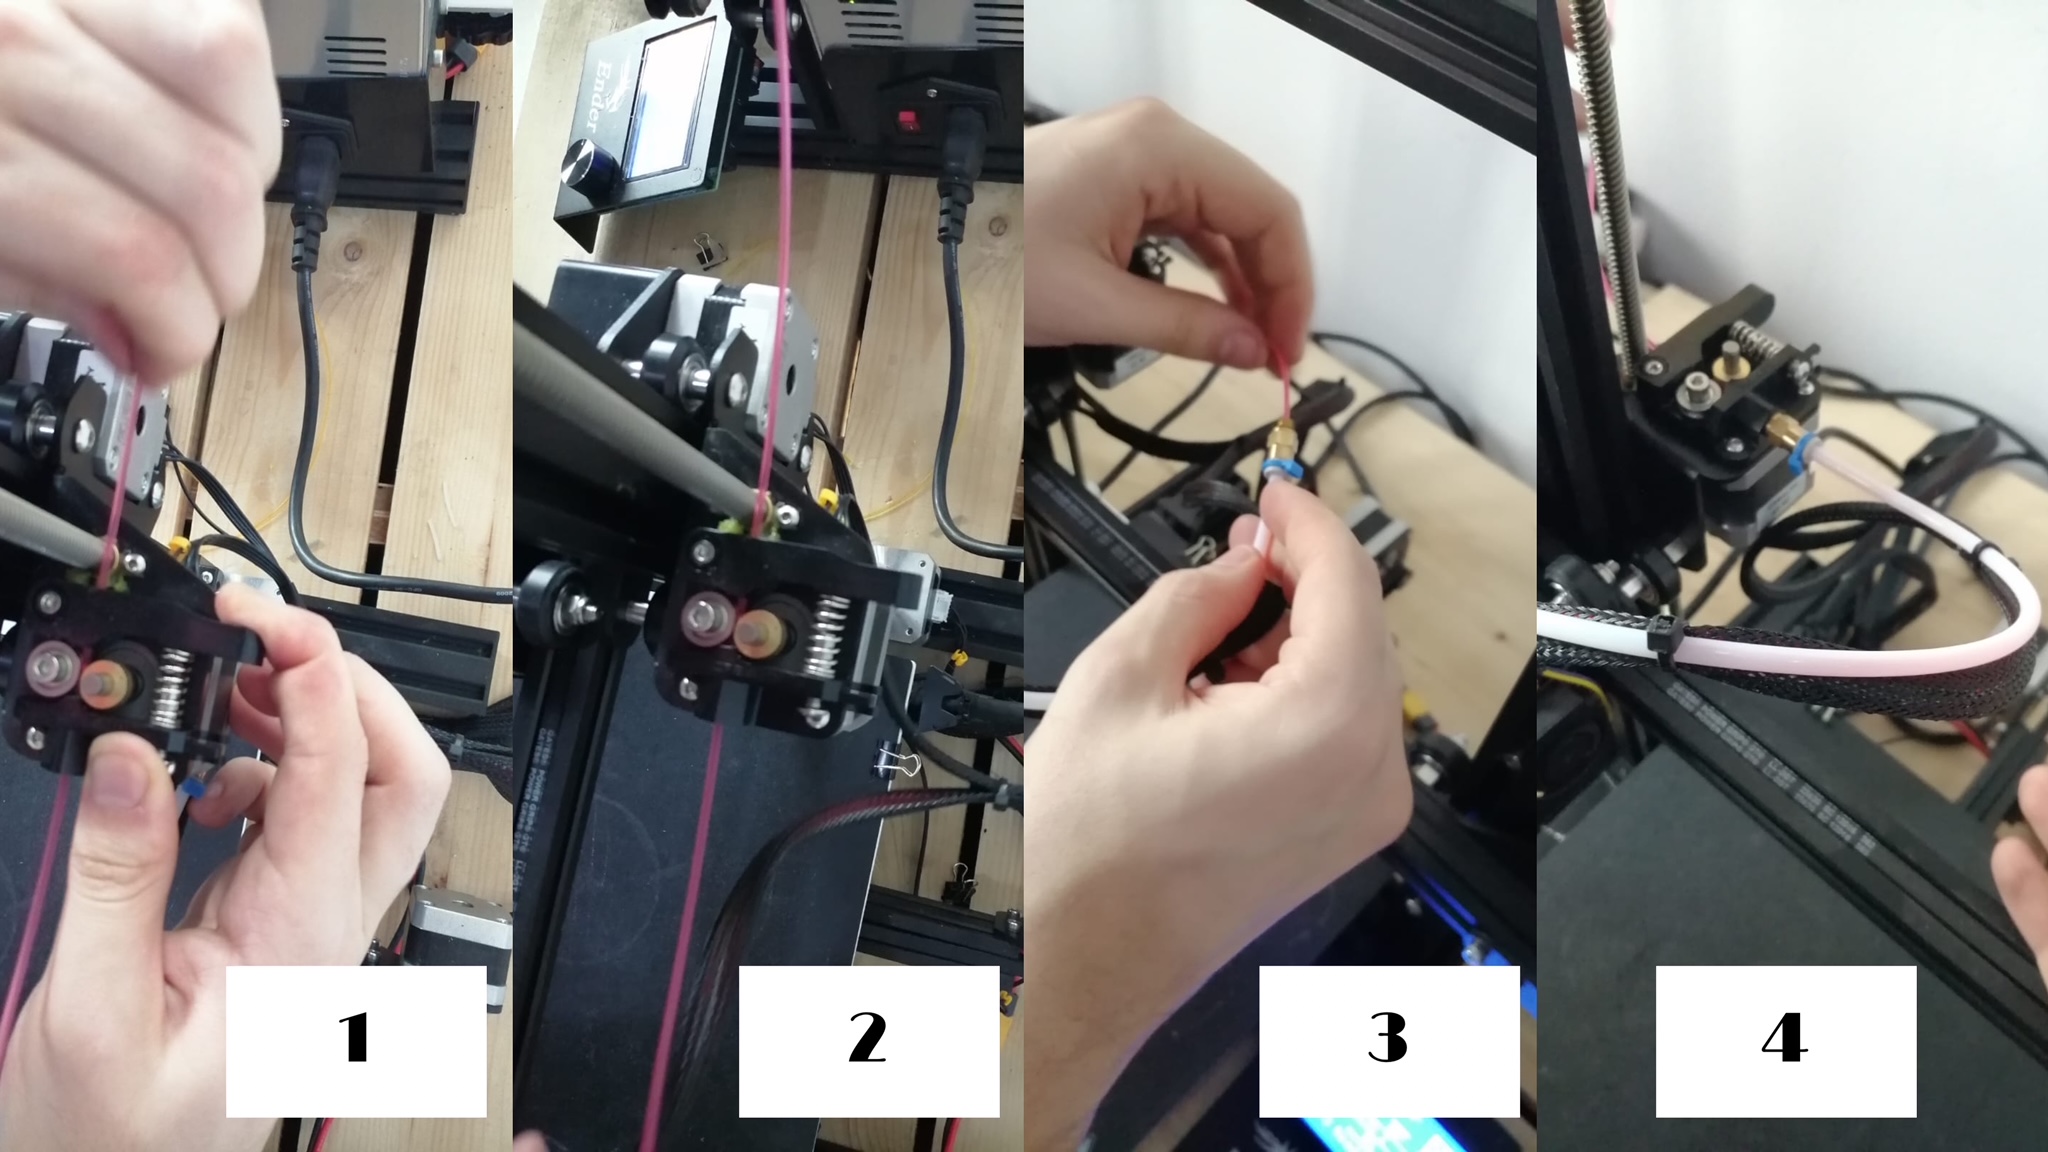
The following photo show how we apply the new filament to the extruder part to the machine.